How to Caulk like a Pro
How Do You Use Caulking?
Caulk is a versatile sealant material used in various applications, including plumbing. It helps create a watertight seal around fixtures and joints to prevent water leakage and damage. Here’s how you can use caulk in plumbing:

- Please choose the right caulk: For plumbing applications, it’s important to use a caulk specifically designed for wet environments. Silicone-based caulk is a good choice as it’s waterproof, flexible, and resistant to mold and mildew.
- Clean the surface: Before applying caulk, ensure the area is clean and free of dirt, debris, or old caulk. Use a scraper or a utility knife to remove old caulk and clean the surface with rubbing alcohol or an all-purpose cleaner. Allow the surface to dry completely.
- Prepare the caulk tube: Cut the caulk tube’s tip at a 45-degree angle to create a small, even opening. Some tubes have a built-in cutter, while others require a utility knife. Next, puncture the inner seal of the tube using a long nail or the metal rod found on most caulk guns.
- Load the caulk gun: Insert the caulk tube into the caulk gun, ensuring the nozzle is facing away from the trigger. Push the plunger rod into the back of the tube and then pull the trigger to engage the plunger.
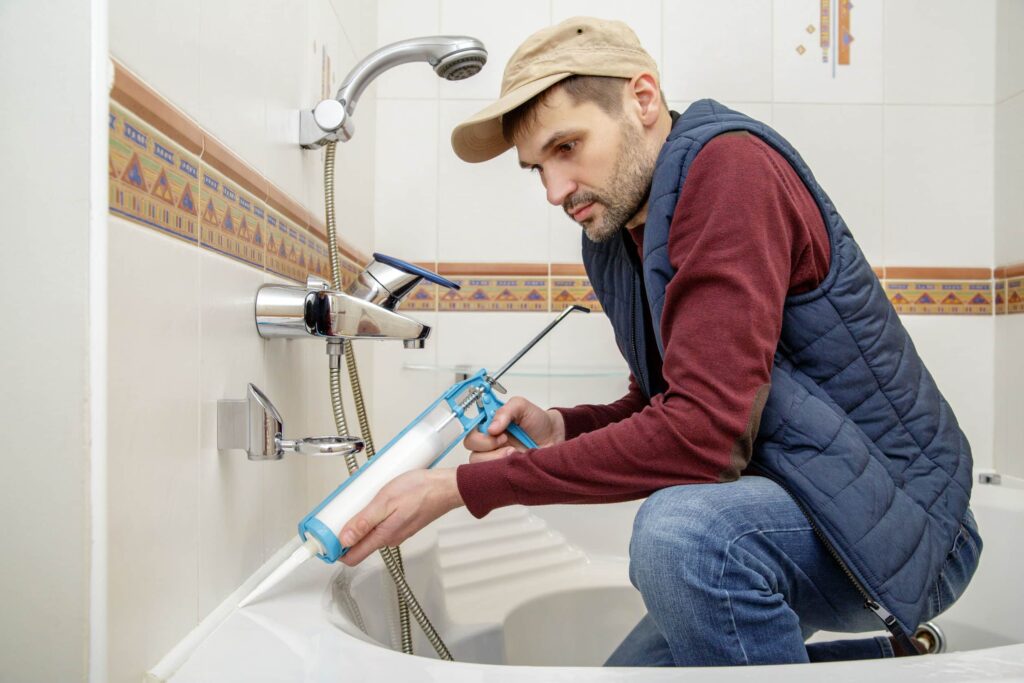
- Apply the caulk: Hold the caulk gun at a 45-degree angle and gently squeeze the trigger while guiding the nozzle along the seam or joint. Apply steady pressure and move consistently to create a smooth, even bead of caulk. Release the trigger to stop the flow of caulk when you reach the end of the joint.
- Smooth the caulk: Use a wet finger or a caulk-smoothing tool to press the caulk into the seam and create a clean, smooth finish. Remove any excess caulk with a damp cloth or sponge. Remember to work quickly, as caulk can start to skin over and become challenging to smooth in just a few minutes.
- Allow the caulk to cure: Most silicone caulks require 24 hours to cure fully, but check the manufacturer’s instructions for the specific drying time. Avoid using the fixture or exposing the caulk to water until fully healed.
- Clean up: Wipe the nozzle and replace the cap, if applicable. Store the caulk tube in a cool, dry place for future use.
Remember to follow the manufacturer’s instructions for the specific caulk product you’re using, as there may be variations in application and curing times.
Caulk can add a finishing touch or look like a sloppy mess of blobs and gaps. In this edition of Mike’s Tips, we’ll share some ideas to help turn you into a caulking pro.
Here’s Mike’s Top Ten List to Caulk Like a Pro
1. Safety First – Because there are many older homes in Bergen County, safety glasses are necessary because bits of old, hardened caulk can come loose and fly up at your face. They depend on the caulk you use and other solvents for clean-up, open windows and doors for adequate ventilation. Work gloves, not rubber gloves, can make it easy on your hands when using tools to remove old caulk.

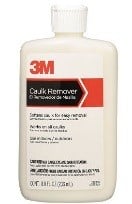
2. Prep – Whether you are caulking a bathtub surround in Hackenackor a wooden window casing in Paramus, preparing the surface is the first step in creating a perfect caulking job. This is often the most challenging part of the job and the step many Do-It-Yourselfers try to cut corners. The fact is that you get out of it what you put into it. That means climbing into the tub with a utility knife and sliding the blade through the old dry caulking where it meets the tub and again where it meets the wall/tile. Important tip: Take your time. Spend an hour or two until your hands hurt or you’re tired. Then cover the cleaned area with plastic or duct tape so you can still use the tub for the morning shower and not let any water pass through where the old caulk used to be. Products that loosen old caulk like 3M Caulk remover, may help soften old caulk. Results can vary from no difference to caulk that softens and breaks the bond. You’ll often find that once caulk has been sitting for years, it will take some “elbow grease”, a little sweat, and a new, sharp blade in a utility knife. Keep a pair of needle nose pliers handy to help you get a grip as you pull the old caulk out of the gap it fills.

3. Another tooltip – The Fabulous 55-in-1Painter’s tool. As the name suggests, it is a single tool with various hooks and lat blades and can help you avoid cracking tiles when the caulk doesn’t move. The five components are designed to scrape paint, spread compound, remove putty, open cracks, and clean rollers. The widest end can open paint cans too. For caulk removal, you can use it to get under old caulk, gently separating the caulk from the tile. You can get them at many Bergen County stores like Home Depot in Paramus or Loews in North Bergen for about $5.
4. Inspect – After you’ve removed all the caulk, look for any smaller bits of caulk still clinging to the tile or tub. A sponge with a scrubber side and products like Goof-Off, also sold at Bergen County home stores in Paramus, Teterboro, and North Bergen, are safe on tile and porcelain and can help make for a clean dry surface to start the next phase of your caulking project.
5. Mold – You’ll likely see mold on old caulk and tiles. Most will come off with the old caulk. One final wash with 50% bleach and 50% water will kill the mold and make the surface perfect for your next step. If you need extra help, add some liquid hand soap, lightly soapy water, and some paper towels or clean rags. Then let it air dry. Run a paper towel over it to make sure it’s completely dry.

6. Caulking Tools for Newbies – If you’re doing a relatively small area, such as a bathtub, you can avoid buying a caulking gun and a tube of caulk. Small, aerosol-based caulking products are convenient, and the caulk doesn’t get away from you like a traditional gun and caulk tube. DAP Simple Seal comes in a 9 oz. Can and sells for about $4 at Bergen County Walmart stores in Saddle Brook, Garfield, and Paramus, among others. Note these aerosol tubes come in white only. No explicit or almond color is available. One other note, snip the smallest hole possible for this product.
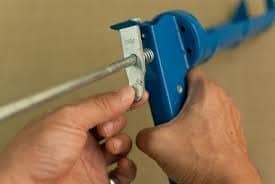
7. When selecting a caulking gun, look for one with a hole near the trigger for snipping the caulking tube tip and a rod near the opposite end that pivots out so you can break the seal in the tube. Push the silver tab to release the plunger and pull it towards you. Insert the caulk tube and slowly press the trigger until it just about fits. You want to be able to take it out, snip the tip of the tube and push the rod in to break the seal. Put the cap back on and press the trigger until the tube reaches the gun’s top. The following trigger pull will start the flow of caulk.

8. Handling Caulk – Here are two essential items I keep close by when I do caulking work. The first is a plastic bowl of warm water. This lets me keep my fingertips clean as I drag them along the bead of caulk put down with a can or a gun. The other is a clean rag to wipe off any excess on my fingers. Most Do-It-Yourselfers wish they had extra fingers when working with caulk. Keeping your fingers clean is the alternative to trying to grow extra fingers Once you put a bead of caulk on the surface you are re-doing, you’ll find that the caulk doesn’t automatically stop oozing out the tip. You can try putting the cap back on, but I find that messy. Now here’s where having two hands is a great thing. I’m right-handed.
9. Once I put a bead of caulk down, I have a rag in my left hand and use that index finger to keep the oozing to a minimum by applying pressure to the tip. Right hand to smooth it out, keeping the fingers clean with the water and the rag. Left hand to keep it from oozing out and making a mess.
10. Clean-Up Time – The last thing you must do is clean up any leftover bits of dry caulk in the tub or on the floor. If allowed to go down the drain, it can cause a blockage, requiring a cleaning out of the drain line. Old caulk can also have some sharp edges. Walking on those bits of dry caulk can feel like a piece of glass got under your feet. Your pets might be curious about the taste of those bits, and then you might be visited a vet. Keep the stopper down on the drain and use a bowl of soap and water to clean the tub and floor. Once dry, you can follow up with a vacuum to ensure no bits are left for you to step on or your pet to taste.
Still need help? No sweat. Call Muccia Plumbing, Heating & AC at 201-343-1414 or click the following link mailto:info@mucciaplumbing.com
About Muccia Plumbing, Heating & AC
Exclusively Serving Bergen County, New Jersey
Michael Muccia is a Master Plumber and the owner and operator of Muccia Plumbing, Heating & AC. Muccia Plumbing, Heating & AC is a full-service Heating, Ventilation, and Air Conditioning (HVAC) service company based in and serving Bergen County, NJ, since 1978. The Muccia Plumbing, Heating & AC team of trained and certified service technicians offers various services, including general plumbing and heating maintenance, for residential and commercial clients.
Whatever your plumbing, heating, air conditioning, or ventilation needs are, it’s easier with Muccia Plumbing, Heating & AC. We treat our customers, large and small, with the best service in the industry. We know you have a choice when considering an HVAC company, and no matter what we do for you, we treat it as the most crucial job in our history. Our experience proves that we know how to work efficiently, which keeps costs low, uses only the best components within budget, and stands behind the work we do.
Muccia Plumbing, Heating & AC has locations in the following areas:
Hackensack | Hillside | Ramsey | Waldwick | Maywood | Tenafly

